Post by comatox on Jul 25, 2005 22:43:32 GMT -5
Hi guys!
If you are interested, I can start a Monday Photoshop Tutorial thread.
This request came from JBHII, and his question was:
One thing I'm always curious about is how others extract parts of pictures and layer them in to other photos (cutting out a watch from one pic, and putting in another tropical island picture for example).
It is actually not that hard, and this tutorial applies to Photoshop 7.0, Photoshop Elements (Photoshop LE) and Photoshop CS.
The most time consuming part is extracting the part of the picture that you want to keep.
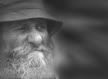
1. Open the picture that you want to modify.

2. Go to FILTER and select EXTRACT

3.Your screen should look like the image below.
At the top left of the screen you can see a vertical row that lists the tools available to you. You need to use the Brush tool to outline the areas that you want to keep.

4. You can zoom in as much as you want by using the magnifying tool and simply trace the outline of the area you want to keep. You don't have to be dead on pixel perfect. You will clean it up later.

5. Your screen should now look like shown below, with a complete and CLOSED line surrounding the areas you want to keep.

6. On the left side where you can see the list of tools available, select the Paint Bucket Tool and fill in the areas that you want to keep, then click OK on the right.

7. Your image should now look like below. All cut out, a bit rough around the edges.

8.On the left side where your tools are located select the Eraser tool. You can pick any size that would be a good fit for the size of the image that you are working with. MAKE SURE that you pick the SOFT BRUSH, which is the second set of brushes available. (soft edges). If you use the hard edge brush your image's edges will be abrupt and kinda ugly.
All you have to do now is go over the edges of you selection and clean it up to your liking.


9. That's pretty much all there is to Extracting an image! You should now have a finished object!

It is a lenghty process. Depending on the size and complexity of your image and how perfect do you want it to be, it can take anywhere between 10 minutes to a good hour to extract an object.
In this case, for this tutorial, and a less than perfect job, it took me about 15 minutes to extract my object. It will probably take a bit longer using a mouse. I use a cheap $100 Wacom digital pen tablet. Makes working on photos a whole lot easier.
Why do you want to extract as opposed to just erasing what you do not want by using the eraser tool?
The answer is pretty simple.
When you work with a JPEG image file, the computer sees your image more or less like a piece of paper. it is always shaped in a rectangle form. So... if you use the eraser tool as soon as you open your picture and erase what you will not want, you will basically end up with a white piece of paper with a drawing on it.
If you use the extract tool, you are no longer working in JPEG. You are now working in PSD format which is a lot more smarter. When you use that tool as shown in my tutorial above, you are basically taking a pair of scisors and cutting out the part that you like, eliminating the unwanted piece of "paper" (or canvas... as photoshop calls it).
Why is that important? It makes working with Layers possible!
If you find this week's tutorial helpful, next week I will introduce you to the most wonderful thing. Working with Layers.
Thanks guys!
If you are interested, I can start a Monday Photoshop Tutorial thread.
This request came from JBHII, and his question was:
One thing I'm always curious about is how others extract parts of pictures and layer them in to other photos (cutting out a watch from one pic, and putting in another tropical island picture for example).
It is actually not that hard, and this tutorial applies to Photoshop 7.0, Photoshop Elements (Photoshop LE) and Photoshop CS.
The most time consuming part is extracting the part of the picture that you want to keep.
1. Open the picture that you want to modify.
2. Go to FILTER and select EXTRACT
3.Your screen should look like the image below.
At the top left of the screen you can see a vertical row that lists the tools available to you. You need to use the Brush tool to outline the areas that you want to keep.
4. You can zoom in as much as you want by using the magnifying tool and simply trace the outline of the area you want to keep. You don't have to be dead on pixel perfect. You will clean it up later.
5. Your screen should now look like shown below, with a complete and CLOSED line surrounding the areas you want to keep.
6. On the left side where you can see the list of tools available, select the Paint Bucket Tool and fill in the areas that you want to keep, then click OK on the right.
7. Your image should now look like below. All cut out, a bit rough around the edges.
8.On the left side where your tools are located select the Eraser tool. You can pick any size that would be a good fit for the size of the image that you are working with. MAKE SURE that you pick the SOFT BRUSH, which is the second set of brushes available. (soft edges). If you use the hard edge brush your image's edges will be abrupt and kinda ugly.
All you have to do now is go over the edges of you selection and clean it up to your liking.
9. That's pretty much all there is to Extracting an image! You should now have a finished object!
It is a lenghty process. Depending on the size and complexity of your image and how perfect do you want it to be, it can take anywhere between 10 minutes to a good hour to extract an object.
In this case, for this tutorial, and a less than perfect job, it took me about 15 minutes to extract my object. It will probably take a bit longer using a mouse. I use a cheap $100 Wacom digital pen tablet. Makes working on photos a whole lot easier.
Why do you want to extract as opposed to just erasing what you do not want by using the eraser tool?
The answer is pretty simple.
When you work with a JPEG image file, the computer sees your image more or less like a piece of paper. it is always shaped in a rectangle form. So... if you use the eraser tool as soon as you open your picture and erase what you will not want, you will basically end up with a white piece of paper with a drawing on it.
If you use the extract tool, you are no longer working in JPEG. You are now working in PSD format which is a lot more smarter. When you use that tool as shown in my tutorial above, you are basically taking a pair of scisors and cutting out the part that you like, eliminating the unwanted piece of "paper" (or canvas... as photoshop calls it).
Why is that important? It makes working with Layers possible!
If you find this week's tutorial helpful, next week I will introduce you to the most wonderful thing. Working with Layers.
Thanks guys!